
About a week ago I decided to migrate my blog to the Ghost platform. I’d been thinking about it for awhile - even installed it once or twice to play around with it - but never fully committed. Truth is, I didn’t really want to switch. I knew that, however little, the process would certainly be more painful than doing nothing. So the pain of going through the switch had to be outweighed by the pain of not switching. I guess that finally happened.
WordPress can do pretty much anything thanks to plugins, but that’s its weakness too… especially if all you want to do is blog. Over the last few years I’ve had to upgrade memory multiple times and setup disk swap space, slog through plugins to determine which were good and then keep them up-to-date, find workarounds for unexpectedly dropped themes, handle weird issues like the white screen of death, deal with a busy interface that (despite their efforts) just leaves too much distraction on the screen while I try to write. There’s just too much overhead. I don’t want to spend so much of my free time maintaining a platform…
I want it to get out of my way and just let me write!
And so here I am, writing my first post on the Ghost platform. Does any of this sound familiar to you? If you’re looking to just get back to the basics, and you want to try switching from WordPress to Ghost, then read on…
What is this tutorial (and what is it not)?#
Let me set the expectations right now… I got it to all work but I’m no expert. This is my personal experience migrating (one time) from a self-hosted WordPress installation to a self-hosted Ghost installation, using DigitalOcean which has a “one-click install” process for both platforms.
A few things to consider:
First, if you’ve been using a managed WordPress installation hosted on wordpress.com, then that’s pretty restricted. You don’t have the ability to install plugins or directly access the disk to get your images. Your data is obviously all accessible or visitors wouldn’t be able to view it, but getting to that data won’t be straight-forward. You may have to contact support, but I’m not sure how easy they make it to leave their platform.
Second, DigitalOcean has their own page on how to use install and use Ghost, and Ghost has documentation on migrating from WordPress, so you may want to check those out first. Who knows, that might be all you need.
Finally, if you’re just looking to have someone host and maintain Ghost for you, look no further than Ghost(Pro). For $20/month they do everything for you… hosting, backups, security, letting you modify the theme and use their API to interact with your site. You still need to download the data out of WordPress to give to them (step 1 below), and I’m unclear whether they give you easy access to your data once it’s uploaded, but it seems like a great deal and one I may consider in the future.
Step 1: Get your data out of WordPress#
You don’t want to lose those old posts! The folks at Ghost wrote up some instructions for migrating posts from WordPress, and it involves their very own WordPress plugin that does some of the work for you. It runs through your content, exporting posts, pages and tags to a file (in JSON format) which you then download and import into Ghost. It has some issues that I’ll cover later, but it gets the job done.
Note 1: If you have a lot of drafts without titles, give them something now. Otherwise the import may fail later until you edit the JSON file and add titles manually. (Alternatively, move them to trash temporarily, which the plugin seems to ignore, and then copy/paste them into the new blog later on.)
Note 2: I ran into a timeout issue running their plugin. After 30 seconds, it’d timeout with a 500 server error. To fix it, I had to increase the php timeout to 120 seconds and run it again. The first suggested fix worked fine - you can find the wp-config.php file in the root of your blog installation, i.e: /var/www/wp-config.php
Now you’ve got your textual data, but you still need to get your images. To do that, you’ll have to setup SSH access to your server (you may find this and this helpful as well). Once you do, the images are in the /var/www/wp-content/uploads folder, organized by year. Just download the whole directory using sftp.
Another option (and the one I used) is to setup the UpdraftPlus Backup plugin in WordPress. I was already using it to backup my site to a Google Drive account once a week so I just manually kicked off the job. Then it was as simple as downloading the file from Google Drive and unzipping it to get all my images.
Step 2: Find some place to call home#
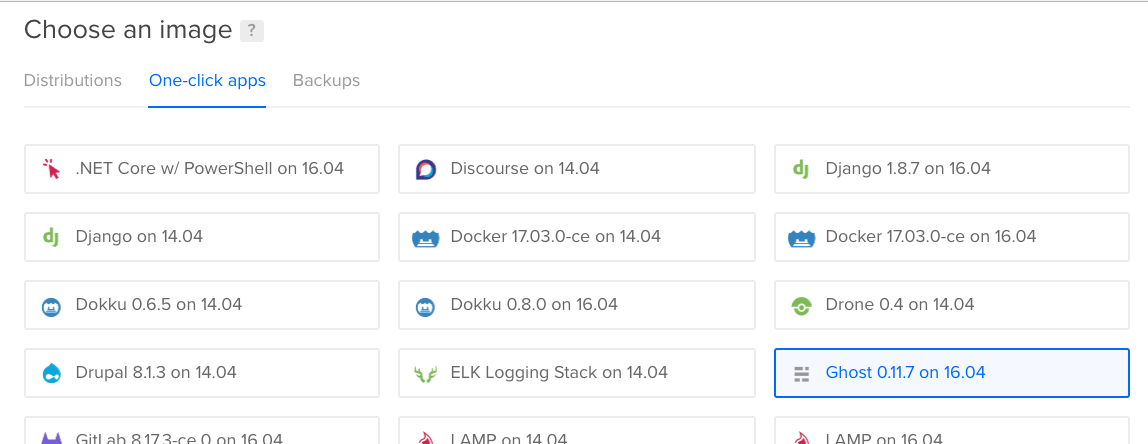
I mentioned the easy route - Ghost(Pro) - but I’m trying to minimize costs so I went the self-hosting way. I’ve been using DigitalOcean for several years so I stuck with them - they even provide a one-click droplet for Ghost that makes it super-easy to get up and running with the latest version. Press the “Create Droplet” button and select Ghost from the “One-click apps”. This is a huge convenience over deploying Ghost yourself.
I selected the $10/month 1GB plan and Ghost seems plenty responsive - much quicker than WordPress was. You might consider selecting “Backups” under “Additional Options” too, especially if you find yourself mucking with the server configurations at all. For $2/month they take a complete snapshot of your entire server every week; restoring it is as easy as one button press.
If you don’t currently have one, purchase a domain name and configure it to point at your droplet. I’ve had great luck with Namecheap. If you do already have one, don’t switch it yet because your visitors will hit a bunch of 404 pages until your content is uploaded.
When you SSH into the server, it’ll tell you a few things that have been setup by default:
- The “ufw” firewall is enabled, blocking all ports except 80 and 443 (http and https) and 22 (SSH and SFTP). That’s good.
- “Let’s Encrypt” has been pre-installed. More on that later, but you’ll want to set that up and enable HTTPS.
- Ghost is configured to use MySQL. You can run
mysql_secure_installationto ready your server for production use. I won’t cover that here, but it’s something to note.
Step 3: Clean up the exported file#
In the instructions for migrating posts, they warn you that the image directory in Ghost is similar but not identical. Open the JSON file you downloaded (in an editor like Atom or Notepad++), and take note of the various images paths in your posts. The date portion of the path should be fine, but /wp-uploads/ needs to be replaced with /content/images/.
You might also want to do a search for your previous host’s IP address. You can leave the domain name alone, but if the IP address is in the JSON file anywhere you’ll want to replace it with the IP address of your new site (which you’ll eventually replace with the domain name, but not yet).
Step 4: First time setup#
Before I could access the admin area of Ghost, I had to open http://<your-ip-address>/ghost/signup and create a new account. From there, I opened the “Labs” section and attempted to import the file, but it kept failing. It took awhile to realize that the list of messages was not of successfully imported files but exactly the opposite - a list of failures and the reason(s) why. Several of my draft posts were missing titles and one had a missing date.
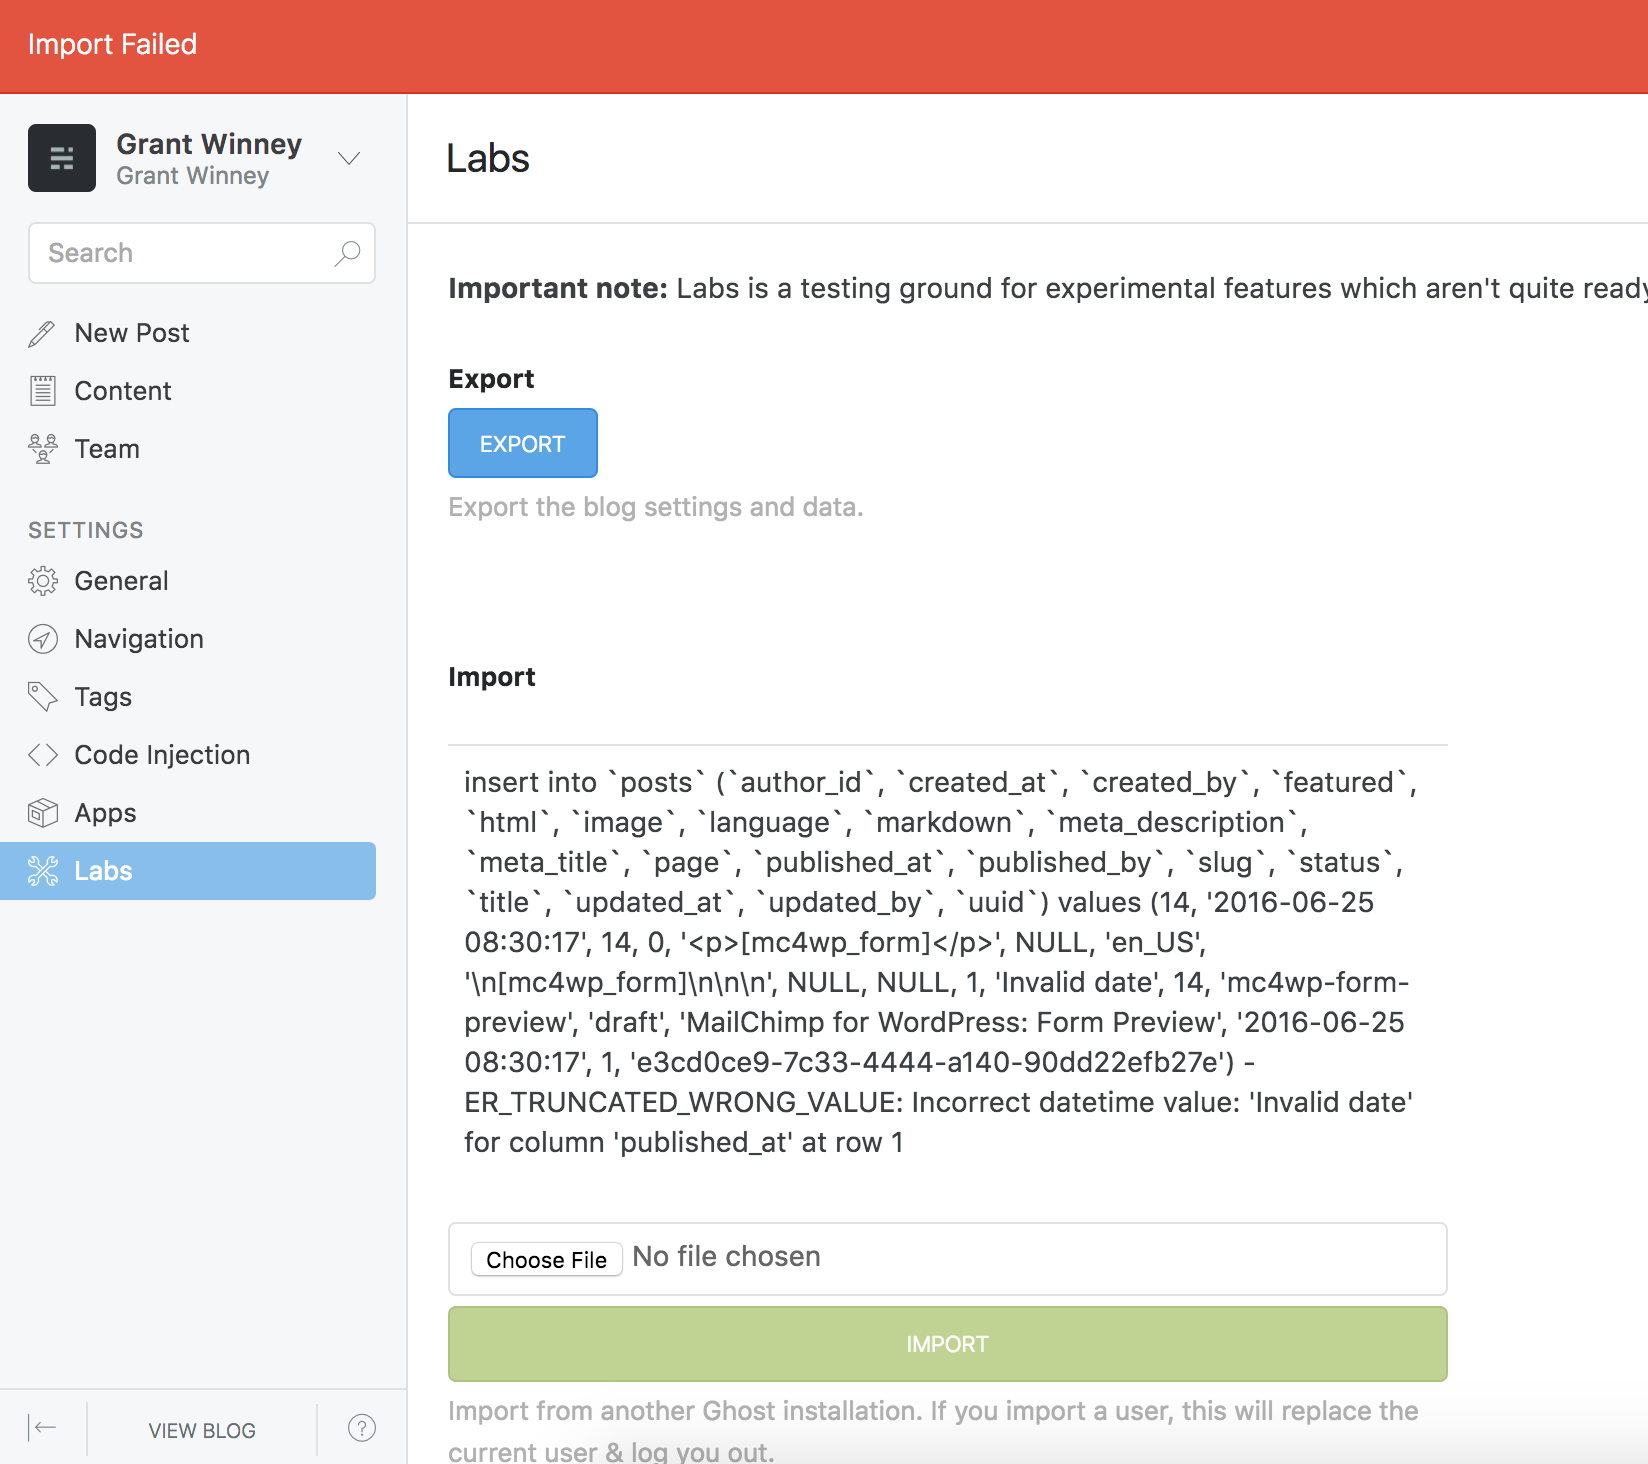
You might find it easier to run the contents of the JSON file through a JSON formatter first, like this one for Atom. It makes it easier to read, and it’ll still import into Ghost just fine. Eventually, everything should import without errors.
Next, upload the images to the /content/images/ directory using the sftp command, and change the owner to ghost. Something like this should work nicely:
sftp -r root@<your-ip-address>
cd /var/www/ghost/content/images
put /local/path/to/your/images/uploads/*
chown -R ghost:ghost /var/www/ghost/content/images
If the posts and images have been correctly uploaded, you should be able to open a few posts and verify that they look okay and the images load correctly (you may have to change image links to your new site’s IP address if you haven’t assigned a domain name yet.)*
Step 5: Assign the domain name#
If you’re migrating from your old blog, it’s time to point your domain name to the Ghost installation. Usually, this means going into your domain name provider’s settings and changing the Type A record to point at your new site’s IP address. Now your site is accessible via HTTP, but I’d highly recommend enabling (and enforcing) HTTPS - you’ll be able to login securely, and Google is using HTTPS both as a ranking factor in their search engine and eventually as the default for Chrome.
Step 6: Setting up HTTPS#
It used to cost money, but thanks to Let’s Encrypt it’s now free for everyone. It’s sponsored by some major players in the tech industry including Mozilla, Google and the EFF. I found the article “Initial Server Setup with Ubuntu 16.04” helpful in configuring my server and setting up proper access - at least the first four steps.
DigitalOcean has an article on how to secure Apache with Let’s Encrypt, but I found a really nice writeup by Robert Nealan: “Setting up SSL for Ghost on DigitalOcean with Let’s Encrypt”. It worked great, and even showed how to setup CRON to automatically renew the certificate. (A downside of Let’s Encrypt is that the license must be renewed every 90 days, which makes sense but is still a pain.)
Note: If you follow the tutorial by Robert Nealan, when you get to the step where you’re uncommenting out the new nginx config lines (currently step 8 in his instructions), leave the following lines commented out (or just remove them). They’ll break Ghost’s ability to serve up the sitemap.xml and robots.txt files, both of which are useful.
#        location ~ ^/(sitemap.xml|robots.txt) {
#                root /var/www/ghost/public;
#        }
Step 7: Second clean up and re-importing posts#
If you’ve gotten this far, you may want to re-import your posts. Open that JSON file again and replace any occurrences of your site’s IP address to your domain name. And if the domain name was previously using the insecure http://, you’ll want to update all of those to https://. The previous instructions showed you how to redirect all http requests to https, so technically things should work just fine as-is, but those redirects cause a small amount of overhead and get you dinged on sites that analyze your website.
There are a couple ways you could approach this. One way is to do what I did. Go to the “Labs” panel and press “DELETE” to delete all your posts. It’ll leave your images and other settings alone. After you’ve updated the JSON file you got from the WordPress plugin, just re-import it and everything should be back and good to go.
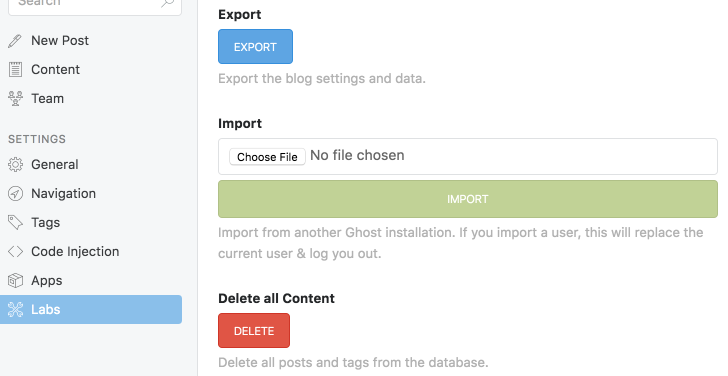
The other option, which I didn’t try but you may want to if you’ve made changes to your posts after you uploaded them into Ghost the first time, is to click the “EXPORT” button on that same screen to export your posts from Ghost. Update that file and then delete all your content and re-import the updated file.
Either way, verify you can still login and your posts are accessible and look okay. Assuming you had WordPress setup to use only your post title as the URL, which is also the default in Ghost, then everything should remain accessible in search engines and no one will be the wiser. Otherwise, you may have to navigate to the “General” panel and select “Include the date in your post URLs” under “Dated Permalinks”. I’m not sure what that format looks like, but if it’s still not the same as your old site you’ll need to look at how to configure your server to direct requests for old paths to the new path. That’s called doing a 301 permanent redirect, and will let search engines know to update their references to your posts. You don’t want to lose traffic! I won’t go into all that here, but this article explains more.
Step 8: A little more cleanup (maybe)#
If that works, it’s time to check each of your posts for formatting issues. The Ghost plugin for exporting your WordPress posts has a few issues. For one thing it messes with some formatting, especially italics. It converted <em>one</em> two to *one *two all over, which wreaked havoc with the formatting of my posts.
Also, if you use a plugin that renders extra html output with css styling and such, like Table of Contents Plus, it tries to convert the rendered output of that plugin but it doesn’t do a great job. There may be some other oddities to clean up too, so you might as well take care of those now.
Step 9: Configuring Disqus#
We’re getting into the optional stuff now.
Most people want to encourage discussion on their blogs. There’s no built-in commenting engine like WordPress has, but Disqus is popular and it integrates quickly and cleanly. Signup for an account and navigate to the install page for Ghost to get the embed code.
https://<your-user-name>.disqus.com/admin/install/platforms/ghost/
Although Disqus has instructions on where to place the code, Ghost has their own instructions on enabling comments that differ so I followed those.
There are a couple of variables in the code they provide (commented out by default) that apparently should be changed (read more here), but they only tell you to replace PAGE_IDENTIFIER with {{post.id}}. I think the PAGE_URL placeholder should be replaced with the unique url for the post, but since I’m not sure which variable holds that I just left them both commented out for now. It seems to work fine, and correctly loads existing comments from my old blog.
After you modify the file, run service ghost restart from the command line (your SSH session) and wait a few seconds. Check out a post and make sure the Disqus commenting system loads at the bottom.
Step 10: Syntax Highlighting#
If you’re frequently posting code snippets on your blog you’ll want something that can format it nicely. You can always enclose code in three backticks (```) but Ghost doesn’t have syntax highlighting built-in by default. Which is good, because many bloggers won’t need it and it’d be unnecessary bloat.
There’s a couple of javascript libraries you can use - I chose Prism.js. It’s awesome in that you choose exactly which languages (such as c# or perl) and plugins (such as showing line numbers) you want to have, and it provides the minimal amount of javascript and css for you to copy into your site.
Once you’ve downloaded the prism.js and prism.css files, use SFTP to upload them to your server in the themes/casper/assets directory. Modify the default.hbs file in the Casper theme to reference both files in the section (near the top) that indicates it’s for scripts and styles. Follow the existing format of using {{assets}} in the links… I think it helps with caching resources or something.
{{!-- Styles'n'Scripts --}}
<link rel="stylesheet" type="text/css" href="{{asset "mine/prism.css"}}" />
<script type="text/javascript" src="{{asset "mine/prism.js"}}"></script>
After including the links, restart Ghost again (service ghost restart) for the changes to take effect. If you need to support additional languages, both files have a custom link on the first line that includes all your selected languages and plugins. Using that link will preselect your current selections, so you can add what you want and then overwrite the files. Here’s a sample URL:
http://prismjs.com/download.html?themes=prism-coy&languages=csharp+ruby&plugins=line-numbers
Another nice-looking library is highlight.js. It has the added benefit of providing a single link hosted out on a CDN that provides something like 22 languages out of the box, so there’s absolutely nothing to install except referencing that link. If enough other blogs are using that same CDN resource, your visitors may have already downloaded and cached it which makes your site load faster. If the languages you need are in those 22, that’s the way to go.
Step 11: Google analytics#
Some people like to track traffic, and Google analytics can help you do that. You’ll find instructions here on how to get the analytics script, which you can then copy into the footer of your blog thanks to the “Code Injection” section of the admin panel.
Bing has its own set of Webmaster Tools as well. You can get a link to include in the header of your blog via the same “Code Injection” section.
Further Reading#
This post has gone on longer than I intended. Here are some other links you may find interesting too…
Nothing left to do now but to get blogging!